Bent Waist Plate Roller Upgrade Installation GuideUpdated 4 months ago
This installation will guide you through installing the Bent Waist Plate Roller Upgrade SKU: RR-BWPRU
First, remove the belt from the old Bent Waist Plate. Next, carefully remove the old fabric belt and loop by using a sharp pair of shear scissors to cut it.
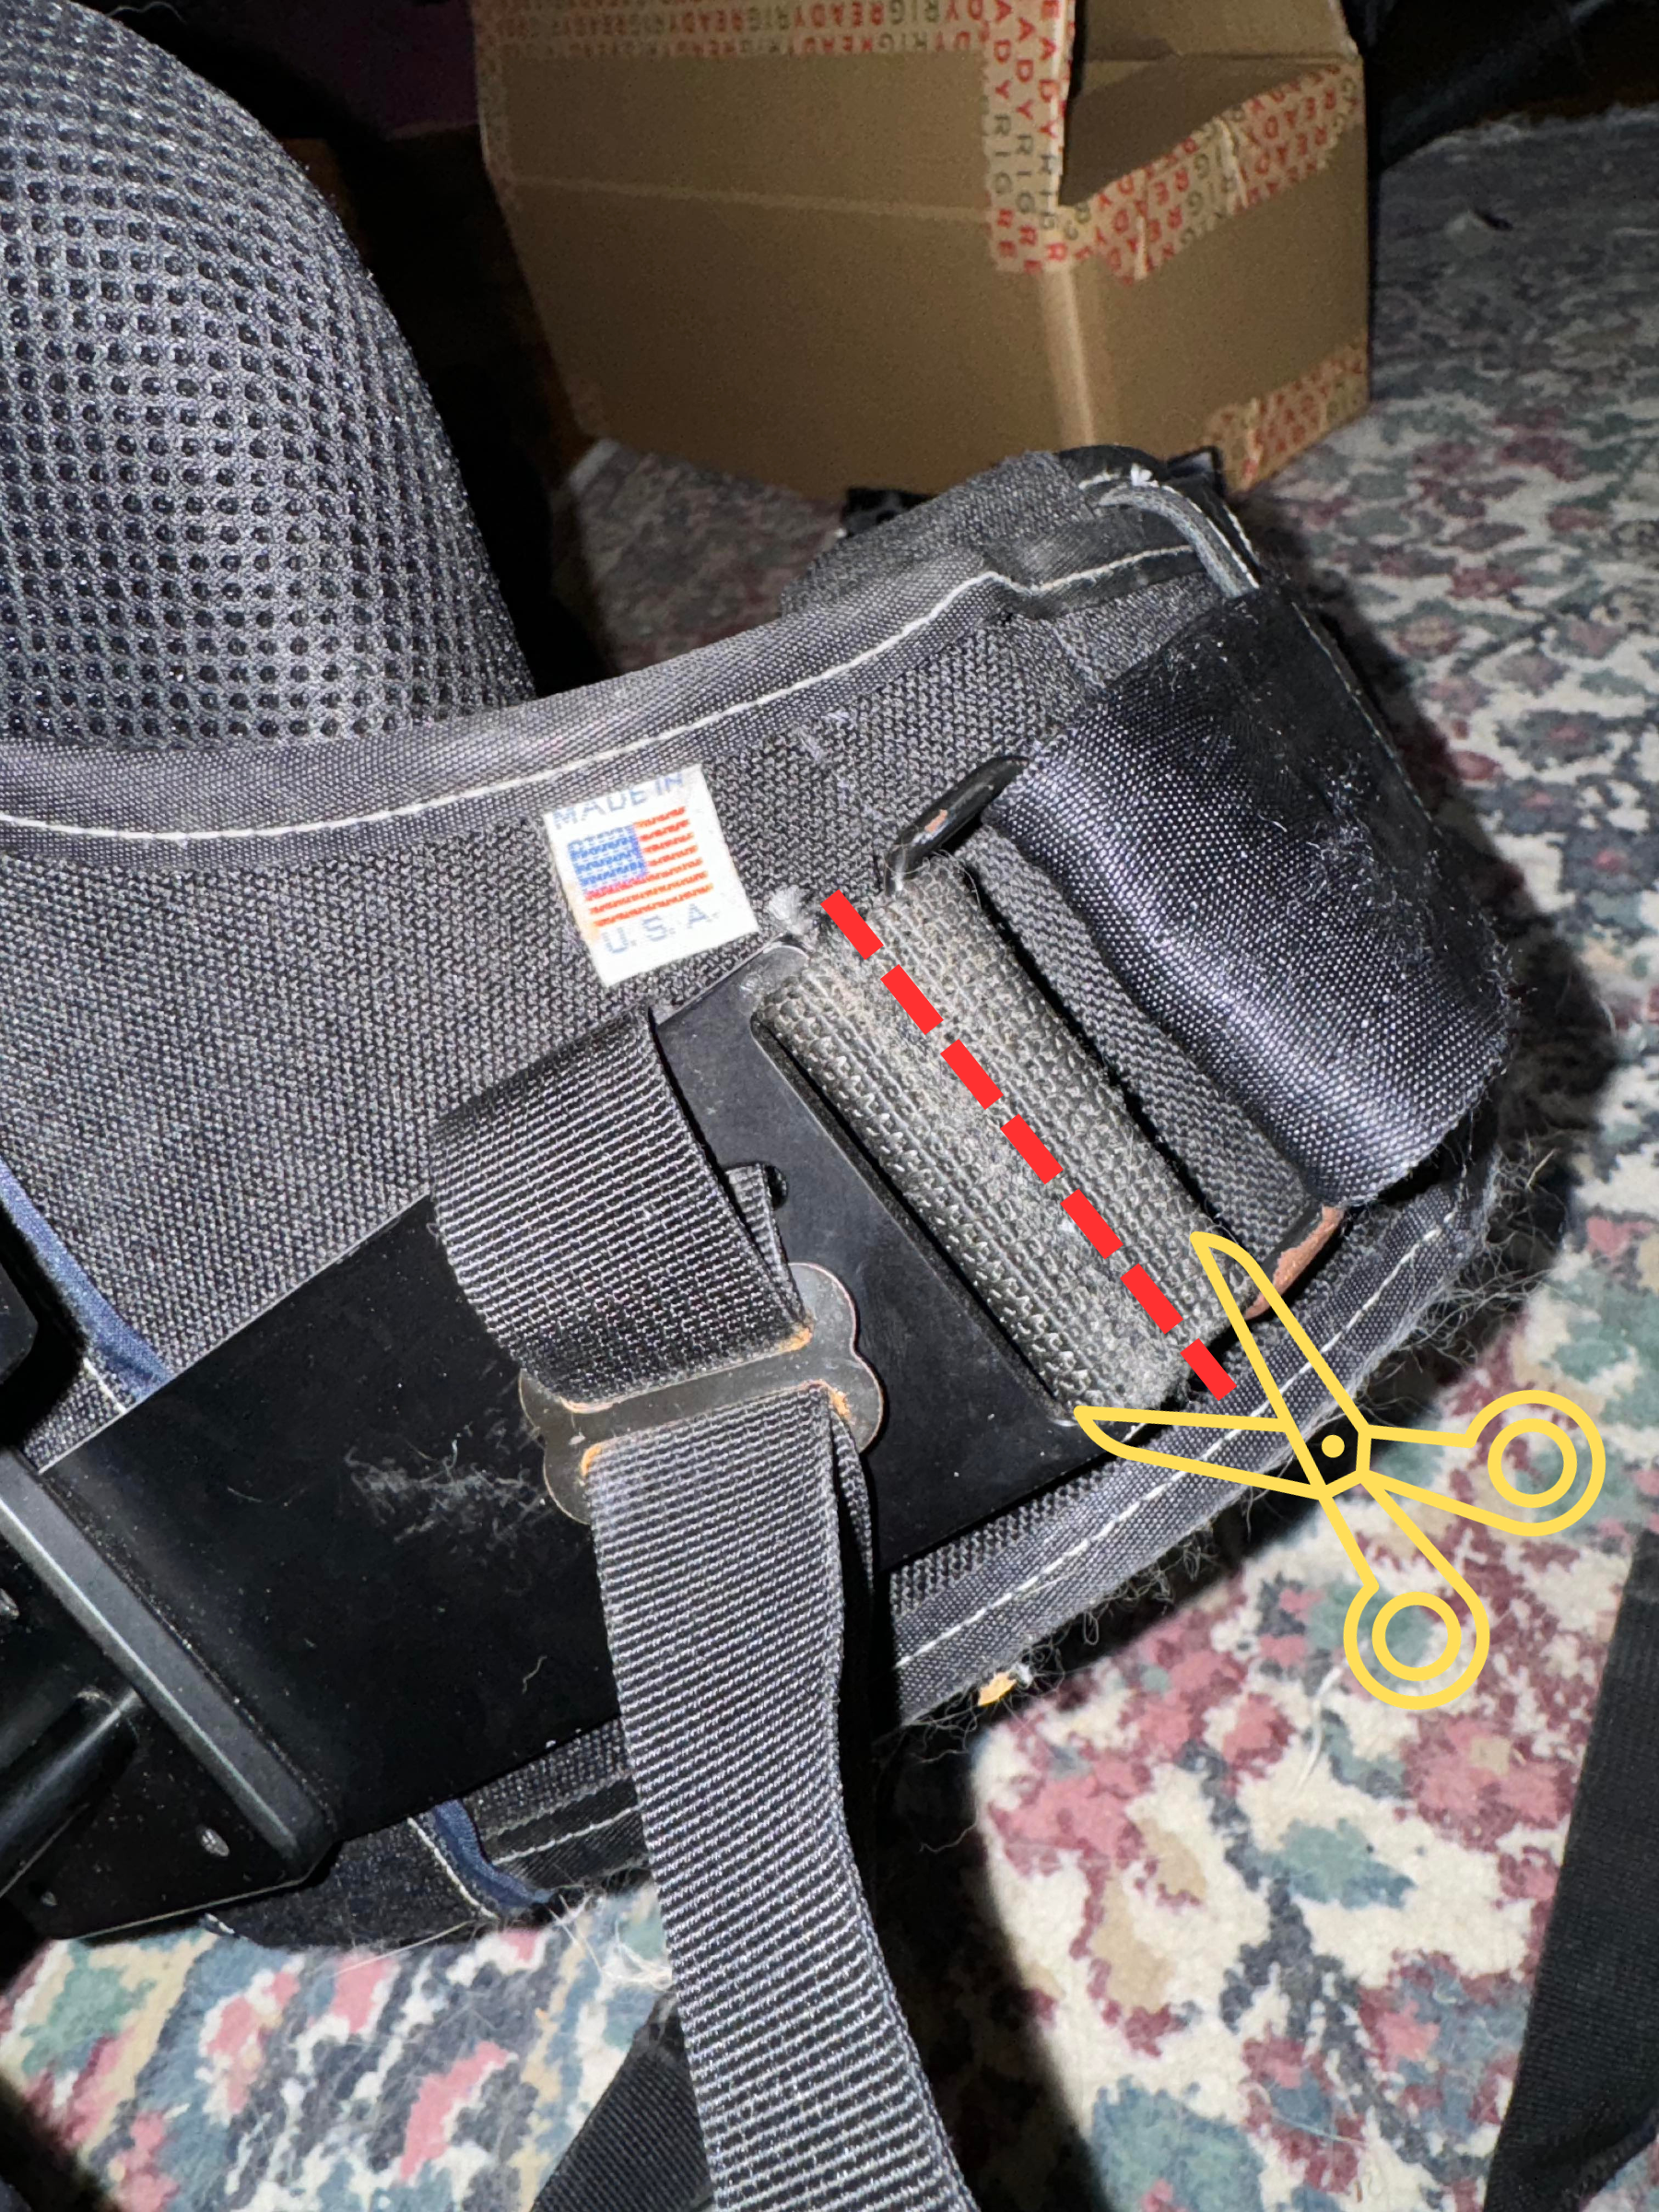
WARNING: Be very careful not to cut yourself. The material is strong and requires a lot of force to cut. We commend using a pair of sharp heavy-duty scissors or shears to cut the fabric. Alternatively, you can use a razor blade to cut the stitching to remove the old fabric by running the blade across the stitching. Please make sure that you are wearing all necessary safety gear while performing this part of the installation.
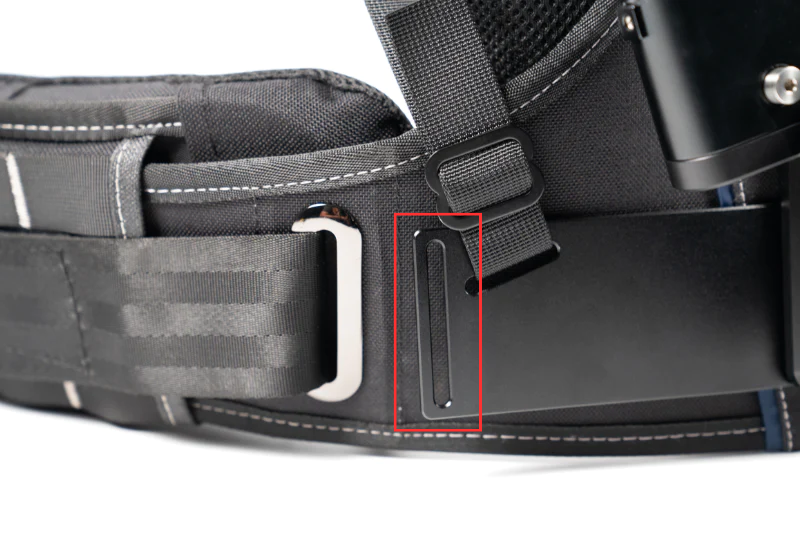
After removing the old fabric, the slot that the fabric was looped through will be exposed.
Next, take out the screws from the Bent Waist Plate Roller Upgrade to prepare it for installation.

Using a 9/64” hex head, install the Bent Waist Plate Roller upgrade onto the Bent Waist Plate loop. For the final step, feed the belt through the newly installed roller to complete the installation.
